Machines And You Headline Animator

Machines And You

NEW

Follow us for more. Know more about mobile phones or Computers. Click here to register to our official web site.

Search This Blog

Showing posts with label Windows Hacking. Show all posts

Wednesday, 11 May 2011

Speed Up SATA Hard Drives & USB Drives In Windows Vista


Follow us for more. Click here to register to our official web site.


Hi friends,

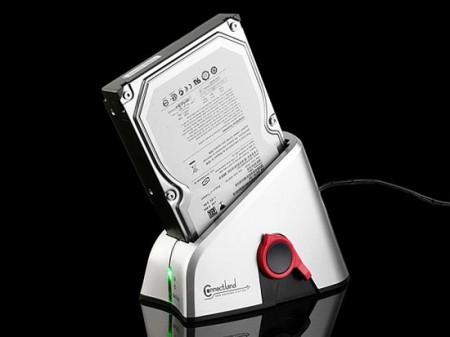
Today I am gonna tell you about how to Speed Up SATA Hard Drives & USB Drives In Windows Vista. Window Vista has built in support for SATA and external drives, but they seem to be slow because the advanced write cache features aren’t automatically activated.

-With just few steps you can enable them and get a much faster response. 

-First you need to go to the Device Manager which you can go directly by just typing device in the start menu search box or just type in devmgmt.msc in command line. 

-Now open the Disk drives section and right click on your hard drive. 

-Now click on the Policies tab and you’ll find this dialog box: Now click the checkbox for Enable advanced performance, and you are done. 

-Write caching isn’t enabled by default as removing devices directly without using the “Safely remove removable device”may lose your data, so be cautious when enabling this options. But enabling this option also when speeding up performance significantly when writing to the disk. 

-Now select the external drive and double click it to open up the properties screen.
-Then just change the setting to “Optimize for performance” and hit OK to continue. 

-You’ll have to reboot for all the settings to take effect. 

-Next time you boot into Windows Vista you’ll see faster bootup times and better disk writing performance.


So this was a simple process on how to  Speed Up SATA Hard Drives & USB Drives In Windows Vista. Hope you have enjoyed it.
Try it .
Comment.
Follow.
Enjoy ..!!!

Tuesday, 10 May 2011

Change the icons of Drives


Follow us for more. Click here to register to our official web site.
 
Hi friends,

Today Soumodip is gonna guide you through a cool and useful hack. Now you can change the icons of your drives in my computer.All the Xp users would have been bored by the boring icons in their My Computer panel which are adjacent to the Hard disk drives(C:,D: or whatever drive letter you have). 
 
Here is a simple tweak by which you will be able to change this monotonous icon to anything you like,even your own Picture if you wish you can put any image in place of one which I have shown,even the picture of your favourite celebrity or your dream caror your own Picture.
   -Here are the steps you need to follow:
          1.First of all the picture you want to use should have .ico extension(if you already have a pic with .ico extension proceed to step 2).Most of the pictures we normally use have extensions like .jpg,.bmp,.png..gif etc, so you first need to convert them to one with .ico extension.
          2.Now go to My Computer.
Suppose you want to put this icon in place of your original C: image. Double click and enter C: .Paste your .ico image file in it.Also create a new text file and in it type the following lines: [autorun] ICON=favicon.ico Remember that ‘favicon.ico’  is the name of your image file.If you have an image file with .ico extension by the name of ‘abc.ico’,then use that in place of ‘favicon.ico’.
          3.Now rename this text file as ‘ autorun.inf ‘ (without the quotes). 

                      N.B. ::: How do I rename my text file as autorun.inf ?
                      Ans.Go to Tools-Folder options.Under the View tab uncheck the ‘Hide extensions for known file types’.Press apply.
                     -Now rename your text file as ‘autorun.inf’.
          4.Now restart your Pc.


 You are done.Check out the cool new picture you have just added in your My computer panel. These were the simple step to Change the icons of Drives .

                    TIP ::: You can use this trick for pendrives and CDs.

I will be back with yet another trick. Till then keep exploring. Enjoy ..!!!

Monday, 9 May 2011

How to delete Administrator password without any software.


Follow us for more. Click here to register to our official web site.

Hi friends,
Today I am back with yet another trick which you can show to your friends. This trick is cool for surprising people at their own house who feel that their computer is safe from you since he has an administrator's password. This trick is a bit tough to try but with a little bit of help from me it would be easy. Now you can rule over all the computers at your home or at your parent's office. There are many methods to do this but today I am jotting down two best methods. Here  they are :

                    METHOD - 1
This Method is a bit tough so try this only if you have proper knowledge about PC Hardwares. Click here to register to our official web site.


          Step 1. Put your hard disk of your computer in any other pc .          
          Step 2. Boot that computer and use your hard disk as a secondary hard disk (D'nt boot as primary hard disk ).          
          Step 3. Then open that drive in which the victim’s window(or your window) is installed.          
          Step 4. Go to location Start > My Computer > windows > system32 > config          
          Step 5. And delete SAM.exe and SAM.log
          Step 6. Now remove hard disk and put in your computer.
          Step 7. And boot your computer .

      N.B.: This trick works without any other damage only if the PC has an administrator password. Try this at your own risk.
     
                    METHOD - 2
This solution works only if your hard drive is FAT kind. Click here to register to our official web site.
                   

              Step 1: Start the PC and before Windows is loaded start pressing F8 button several times, this will show you the booting option.
            Step 2: Choose to boot up with Command Prompt.
            Step 3: Type the following commands:
                   cd C:\Windows\system32\config
                       del sam.exe
                       del sam.log
                       exit
            Step 4: Now when you restart, the password on your built-in administrator account which will be blank (i.e No password). 

         So, friends these were the two Methods to delete the administrator's password. Comment about your thoughts. I will be back with another trick. Till then keep exploring. Enjoy ..!!!

Create fake error messages


Follow us for more. Click here to register to our official web site.


Hi friends,
Today I, Soumodip Sinha, am gonna tell you how to make a fake error message in windows using nothing but notepad.

Imagine u send an email to your friend containing an attachment and when the person opens it he finds an error message saying that you have taken over his computer. It would really be awesome right ?? So, here is the simple steps to do this mischief.
  •     Firstly, go to Start > All Programs > Accessories > Notepad.

  
  • Then, type in this coding :  
                 lol=msgbox("Any message",20,"Warning")
               
       N.B:  In the place of "Any message" write the matter explaining the trouble. This is 
          merely imaginary since the problem would be whatever you write since there is no main   
          problem.
                 In the place of "Warning" write what you would like the heading to be. You would want it 
          to be brief and simple to give it a real look.
                 The rest of the coding has to be exact and precise with no extra spaces or punctuations.

  • Next, Click on File > Save As. Type the desired name. But before clicking on Save you have to change the save as type to "All Files" and add the extension .VBS (in capitals) and click on save.
  • To give it a more realistic look and to trap more people change the icon by right-clicking on the file and clicking on Properties.
  • Now add the file as attachment of email or send it to any pendrives.
  • It would look like this :


  • It cannot be cancelled. Dont bother on pressing Yes or No as both will have no effect.
    N.B.:  This is only for educational purpose and it is strictly told not to use it to bully unknown people. The site is not responsible for its use.

       Hope this was useful. Enjoy ..!!!


Shortcuts for Microsoft Word 2007


Follow us for more. Click here to register to our official web site.
Hi friends,
Today I am sharing with you some cool shorthands for drawing lines in MS Word 2007. This software have now become the part and parcel of human life . We use it all the time. Moreover every one is quite used to it. But far all a problem arises when we want to draw horizontal lines. So, today for your convenience I am jotting down a few helpful points.You can add horizontal lines in Word 2007 document quickly by using these shortcuts to break two paragraphs, to mark the end of a document or to break the numerous sections of a document. By simply using a new character such as an asterisk or a pound sign, you can add style to the Word document.Drawing lines are the most easy when we do it directly from the keyboard. These are the easiest way to save time in this regard

Here they are :

    1. For a simple straight line, type three dashes (—) then  press Enter.
    2. For a stylish horizontal line, type three asterisks (***) and press Enter.
    3. One more is to type 3  underscores ( ___ ) and press Enter.
    4. For double line type three equal signs (===) and hit Enter to get this line.
    5. Again u can try 3 pound signs ( ### ) and press Enter
    6. Now last but not the least is my favorite .You can also get this by typing in three tildes ( ~~~ ) and hitting   Enter.

   N.B: tildes can be used by pressing Shift+ the button left to "1".

This is a useful trick for busy people and corporate workers. Hope it proves useful. Thanks for reading. Enjoy ...!!